You are viewing the arm version of our documentation.
Creating your first VM
Step by step on how to create your first VM
Prerequisites
- You’ve installed the Anka Virtualization package
- The machine you wish to use is M1 and not Intel
- The machine you wish to use has Monterey installed
1. Obtain the macOS installer
In the beta release of Anka 3.0, you will not be able to use installer .app files like you’re used to with the Intel (2.X) versions of Anka. Anka 3.0 will download the latest Monterey version for you automatically.
2. Create your first VM Template
Avoid the use of sudo commands as there are issues with non-sudo users launching VMs with sudo in the initial beta.
Creating a VM in Anka 3.0 differs from the Intel version. Anka 3.0 requires that you manually set up macOS inside of the VM. See step #3 below.
Anka VM Templates support the following macOS versions:
12.x(macOS Montrey)
Using the Anka UI
- Click on Create new VM.
- Click on Options and set any non-default values you want.
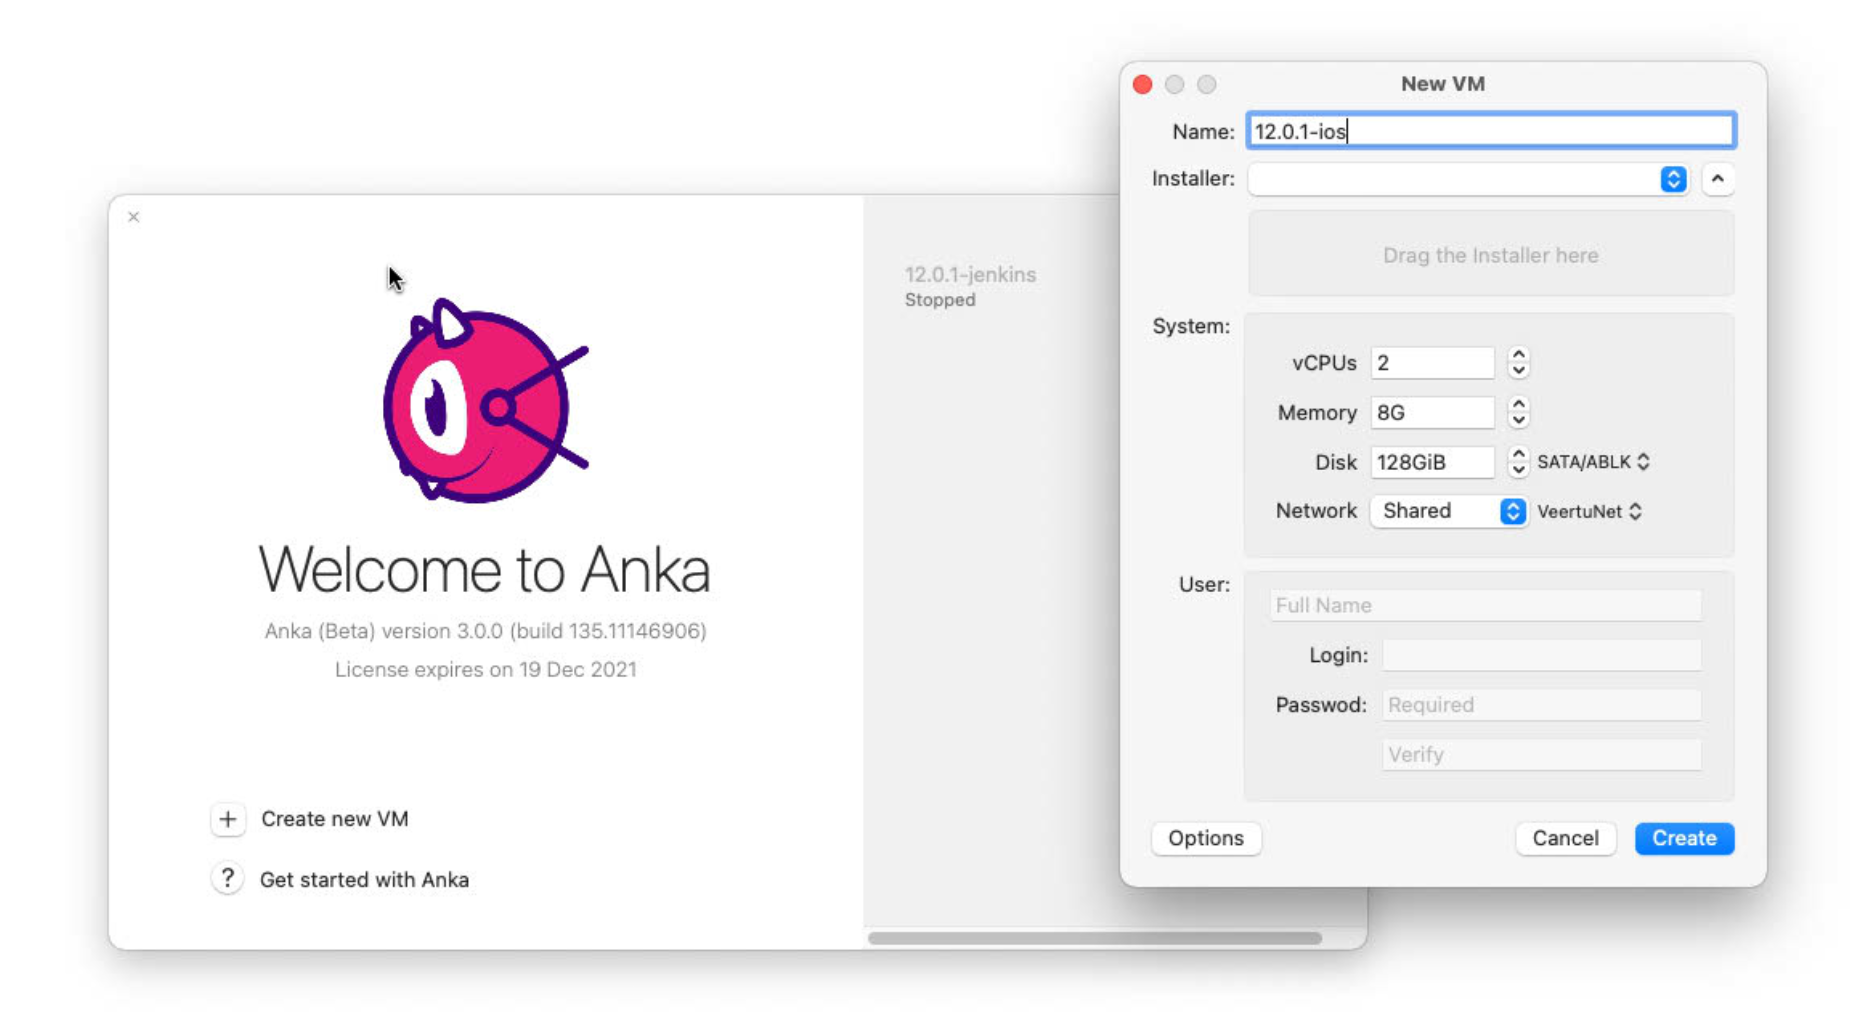
- Be patient while it’s creating.
Once the VM template is created, you will see it on the sidebar.
Suspending VMs is currently not available.
Using the Anka CLI
> anka create --help
usage: create [options] name

   Creates a VM Template

options:
  -m,--ram-size <val>      Set the VM RAM size (??|??K|??M|??G|??T)
  -c,--cpu-count <val>     Set the number of vCPU cores for the VM
  -d,--disk-size <val>     Set the VM disk size (??|??K|??M|??G|??T)
  -a,--app <val>           Path to the macOS restore image
❯ anka create -a latest 12.0-beta
######################################################################## 100.0%
00c44c30-174a-4266-8833-89d6975754bd
3. Start the VM and finish the macOS install
Be sure to install the addons package. This will be mounted as a disk into the VM (-u). Once they’re installed, your VM is ready to use!
With the UI
The first beta release does not support mounting addons by starting from the UI. Please use the CLI for now.
With the CLI
You’ll need to start the VM with anka start -uv to launch the viewer;
anka view does not currently work post-start unless you started it with -v.
> anka start --help
usage: start [options] vmid

   Start or resume a VM

options:
  -f,--force               Start VM with minimum checks
  -q,--quiet               Minimize output
  -v,--view                Open VM in an Anka window
  -u,--update-addons       Start in (auto)update mode
Listing available VMs in the CLI
❯ anka list
+---------------------+--------------------------------------+----------------------+---------+
| name                | uuid                                 | creation_date        | status  |
+---------------------+--------------------------------------+----------------------+---------+
| 12.0-beta-xcode13.1 | 61e1a370-89b4-435a-a816-8bfdf7e9fe5a | Oct 15 08:20:40 2021 | stopped |
+---------------------+--------------------------------------+----------------------+---------+
| 12.0-beta (v2)      | 26c18e20-f67a-4387-a7b7-236a277bb424 | Oct 15 08:20:40 2021 | stopped |
+---------------------+--------------------------------------+----------------------+---------+

❯ anka --machine-readable list | jq
{
  "status": "OK",
  "body": [
    {
      "name": "12.0-beta-xcode13.1",
      "uuid": "61e1a370-89b4-435a-a816-8bfdf7e9fe5a",
      "creation_date": "2021-10-16T07:20:40Z",
      "status": "stopped"
    },
    {
      "name": "12.0-beta",
      "uuid": "26c18e20-f67a-4387-a7b7-236a277bb424",
      "creation_date": "2021-10-16T07:20:40Z",
      "version": "v2",
      "status": "stopped"
    }
  ]
}

❯ anka --machine-readable list --field name --field version | jq
{
  "status": "OK",
  "body": [
    {
      "name": "12.0-beta-xcode13.1"
    },
    {
      "name": "12.0-beta",
      "version": "v2"
    }
  ]
}
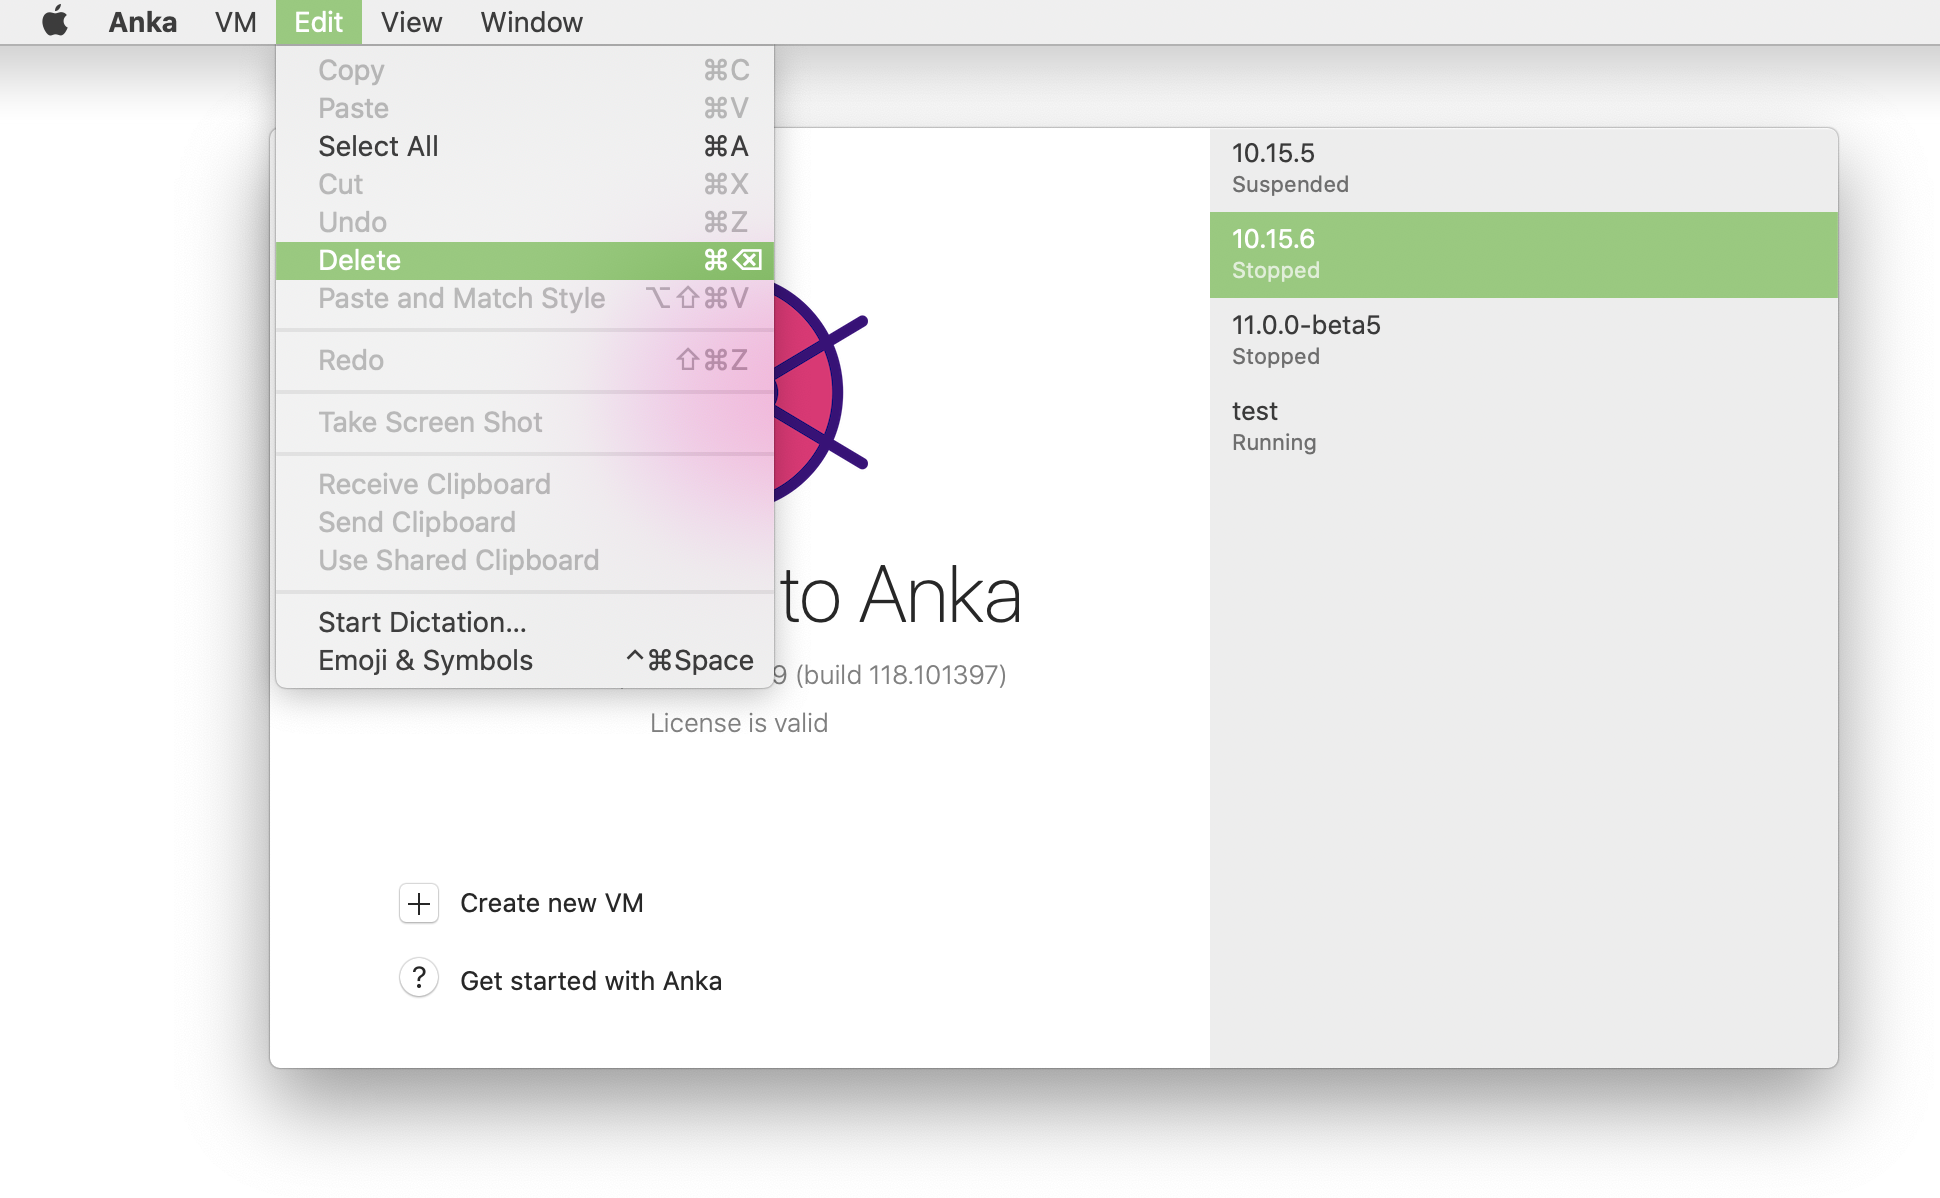
Deleting a VM
Using the Anka UI
Using the Anka CLI
❯ anka delete test
are you sure you want to delete vm 77f33f4a-75c3-47aa-b3f6-b99e7cdac001 test [y/N]: